Showing posts with label Kestrel. Show all posts

Monday, May 24, 2010

New Release - American Kestrel in Pine

I finished this American Kestrel male this past weekend. This project was one that took place over a number of months with other projects causing it to be placed on hold numerous times. It felt really good to finish him up. It was extra special given that I was able to place the bird on a pine branch presentation.

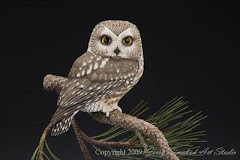
Originally it was going to be placed on a dead stand which would have been similar to the other Kestrel presentations I've done. The owner saw the Saw-whet piece I did for worlds last year and asked if we could put him in a pine setting. This allowed me the opportunity to explore a concept I've had for sometime now with a broken topped pine tree. I have a couple trees on my property that have broken tops and viewing these trees over the years has always given me the idea of placing a bird up there. The Kestrel was a perfect carving to play with this idea.

Not only exploring the compositional elements, but also playing with new ideas for pedestals. This one used a piece of Butternut with a natural stain to show off the grain of the wood while the color of the wood would work well with the sculpture. Also, I wanted a wood that would tie in well with the Kestrels color a bit more. That turned out to be Cherry wood. I also liked the idea of placing a black spacer in-between the wood blocks to add a touch of class to the piece, yet not overpower it.

One thing I found with these tall presentation sculptures is the need for a solid base. If the base is too narrow it is easily knocked over. I have always loaded the pedestal with lead, but it would still have a sense of instability if bumped just right. So, with this pedestal presentation I widened the base with each layer of wood in addition to the lead weighting. The combination was perfect as this piece has no sense of instability at all. I will be using this design again for other tall sculpture presentations.

To see additional photos of this bird please visit my New Release page on my website http://www.simchuk.com/19601.html

Saturday, February 20, 2010

Current Work in Progress - Kestrel - 5th Posting

In this weeks progress posting I am showing how I handle the soft feather groups. Soft feathers don't require individual feathers to be cut in place as was the case with the wing and tail feathers, rather I cut in groups of soft feathers.

The steps in creating soft feathers:

1. Draw in the feather groups. Use an S shape when creating these groups. Going from small groups around the head, to larger as you reach the flanks. Each group represents a group of soft feathers. I try to follow the natural feather flow in all areas when creating these groups.

2. Cut the feather groups. I use a diamond flame to cut these in (football shape). I try to vary the depth of these cuts to create variation of depth across the soft feather area. Deeper down the center and back portion of the birds body.

3. Round over the edges. Using the carbide flame cutter, I roll the edges so there are not sharp or steep drop offs from one group to the next.

4. Refine groups. At this point I will go in and make some valleys deeper or shallower to create a nice flow and variation from group to group over a given area.

On the breast, belly, flanks and under tail coverts I will cover the entire area with these soft feather groups. On the scapulars, forward wing coverts, cape, and nape I will only do partial groups to give an impression of feather groupings. Basically I don't want to have these areas too lumpy - bumpy.

Saturday, February 6, 2010

Current Work in Progress - Kestrel - 4th Posting

In this weeks progress posting I will review the feather layout for the wings and tail. In this first image you see I have drawn in place the feathers that make up the wings and tail.

Also you will notice that I have drawn in feather groupings for the Scapulars, Cape, and forward wing coverts. These feather groups are considered soft feathers and the individual feathers won't be separated out as in the other wing and tail feathers.


This next photo shows all the main wing feathers cut into place. At present they look stacked in place due to the abrupt edge. At this time too, I went ahead and did some undercutting of the primaries. Still leaving them plenty thick for strength as I continue to work the bird.

Also take note of the soft feather groups. they were cut in and given a soft rolling in and out of each valley. The next posting will review how this is accomplished.


In this photo notice how I softened the edges of the individual feathers. This makes it more realistic and gradual step down from one feather to the next. The only feathers with a much more abrupt edge are the primaries, tail feathers, and any area I want to show lift and separation.

You might notice I went ahead and created the major feather splits or separation around the head and cheek patch. Later postings you will get to see a closer view of this work.

Sunday, January 31, 2010

Current Work in Progress - Kestrel - 3rd Posting

It has been a little time since I was able to post the progress of the Kestrel. I'm now back and we will continue showing progress steps for this bird.

Since the last progress posting I was able to refine both the head and body shape. No more square parts to the bird.

As for the head, the things that took place: Lock in the shape and form of the bill, establish the cheek patch, get the throat defined and basic rounding and shaping of the overall head.

As for the body, the cape, scapulars, wings, breast, belly, tail, and primaries were all sized and shaped.

Now what you see starting to take place is the initial layout of the major wing feather groups. Right now it looks like stair steps from one group to the next. All stepping down as you work from the front of the wing to the back of the wing (primaries).

Tuesday, January 12, 2010

Current Work In Progress - Kestrel - 2nd Posting

The initial day consists of truing up the cutout so it more closely aligns with the pattern. I will also begin shaping the birds body and head.

From this photo you can see I'm already starting to round the body (back and wings). Also at this point I have only removed some of the wood above the eyes on the head and identified the location of the cheek patch.

With this initial roughing work I will be able to see if the bird will turn out the way I want for the finished presentation. And, in this case he is coming together as I had envisioned.

Saturday, December 5, 2009

Current Work In Progress - Kestrel - Initial Posting

Over the next few weeks I will show some progress photos of my current project. This week I will begin working on an American Kestrel male that will be perched on a pine branch. During this project you will get to see how I turn a block of Tupelo wood into a competition caliber sculpture.

Plus, if you have always wondered how I create the habitat or branch in this case, you will get to see how I create it as well.

In this photo you can see that I have already cut the bird out of the block using my profile and top view pattern. With this cutout, I can now begin establishing the head placement and body shape.